
Herbs are used in many ways. Medicinal herbs are plants that can help support your overall health. Scientific testing is showing positive results that support the ageless wisdom of our ancestors. Herbs can easily be made into teas, topical creams, and tinctures.
Sometimes the line is blurry between a medicinal herb and a culinary herb. Take mint for instance. It has wide use in flavoring salads, summer drinks and even chewing gum. Mint is also well known as a remedy for indigestion and tummy aches. Read my article on growing mint.
This article will introduce you to 6 common medicinal herbs and how to grow them. The herbs that I have suggested have grown well for me in Zones 5 & 6. In addition, At the end of the article I have step by step guidelines for making salves and teas.
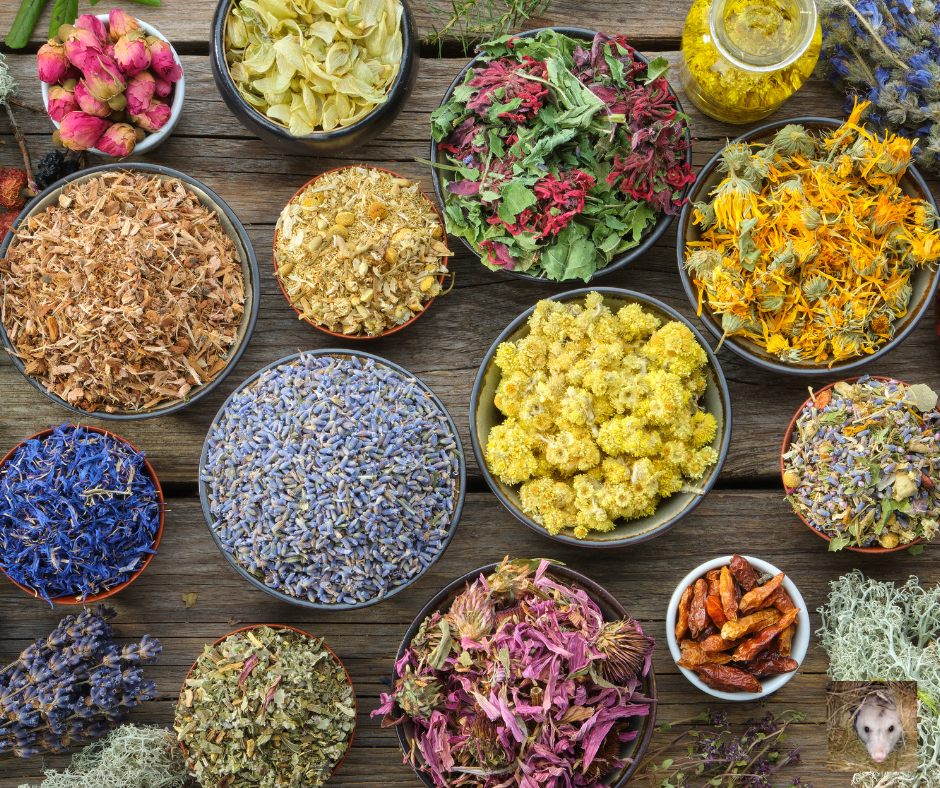
Drying medicinal herbs is easy and lets you use them through the winter in teas and remedies.
Herbs in the Garden
Herbs are often the easiest plants to grow. They do well in most soil types and adapt easily. Medicinal herbs appreciate a garden bed enriched with aged compost. If your soil is heavy clay, like mine, dig in a little bit of sand to help with drainage. Most herbs do not like wet feet. Greensand works well for loosing heavy soil.
Herbs may have a dedicated place in the garden. I have different locations for my perennial and annual herbs. I have a dedicated area for culinary herbs, many of which are annuals, on the back porch near the kitchen. The great thing about herbs is they can be grown in-ground, raised beds or containers.
Putting herbs in a flower garden also makes a good atheistic sense. Especially if you are in an urban area and want to utilize your front yard. Many such as echinacea have beautiful flowers and are beneficial to pollinating insects.
For the sake of simplicity, I am going to help you plan a dedicated medicinal herb bed that focuses on some of the most common and easy to grow medicinal herbs. The plants I recommend look beautiful, will attract pollinators, and will provide you with many ingredients for natural remedies. They are also easy to grow.
Raised Beds
I find that raised beds work well for herb gardens. This allows for good drainage and lets them develop strong root systems. Some medicinal herbs such as comfrey can be invasive so a raised bed helps keep them in their place!
You can divide that raised bed space into one-foot spaces such as we would in a square foot gardening design. Most plants will need one square each.
Starting Herbs From Seed
Most herbs are easy to start from seed. Some that can be more challenging are rosemary, lavender, and thyme.
Plant herb seeds directly in the garden after your first frost or start them indoors. Starting them indoors gives you a head start on the growing season and also lets you monitor for germination. Herbs may take up to three weeks to germinate so be patient!
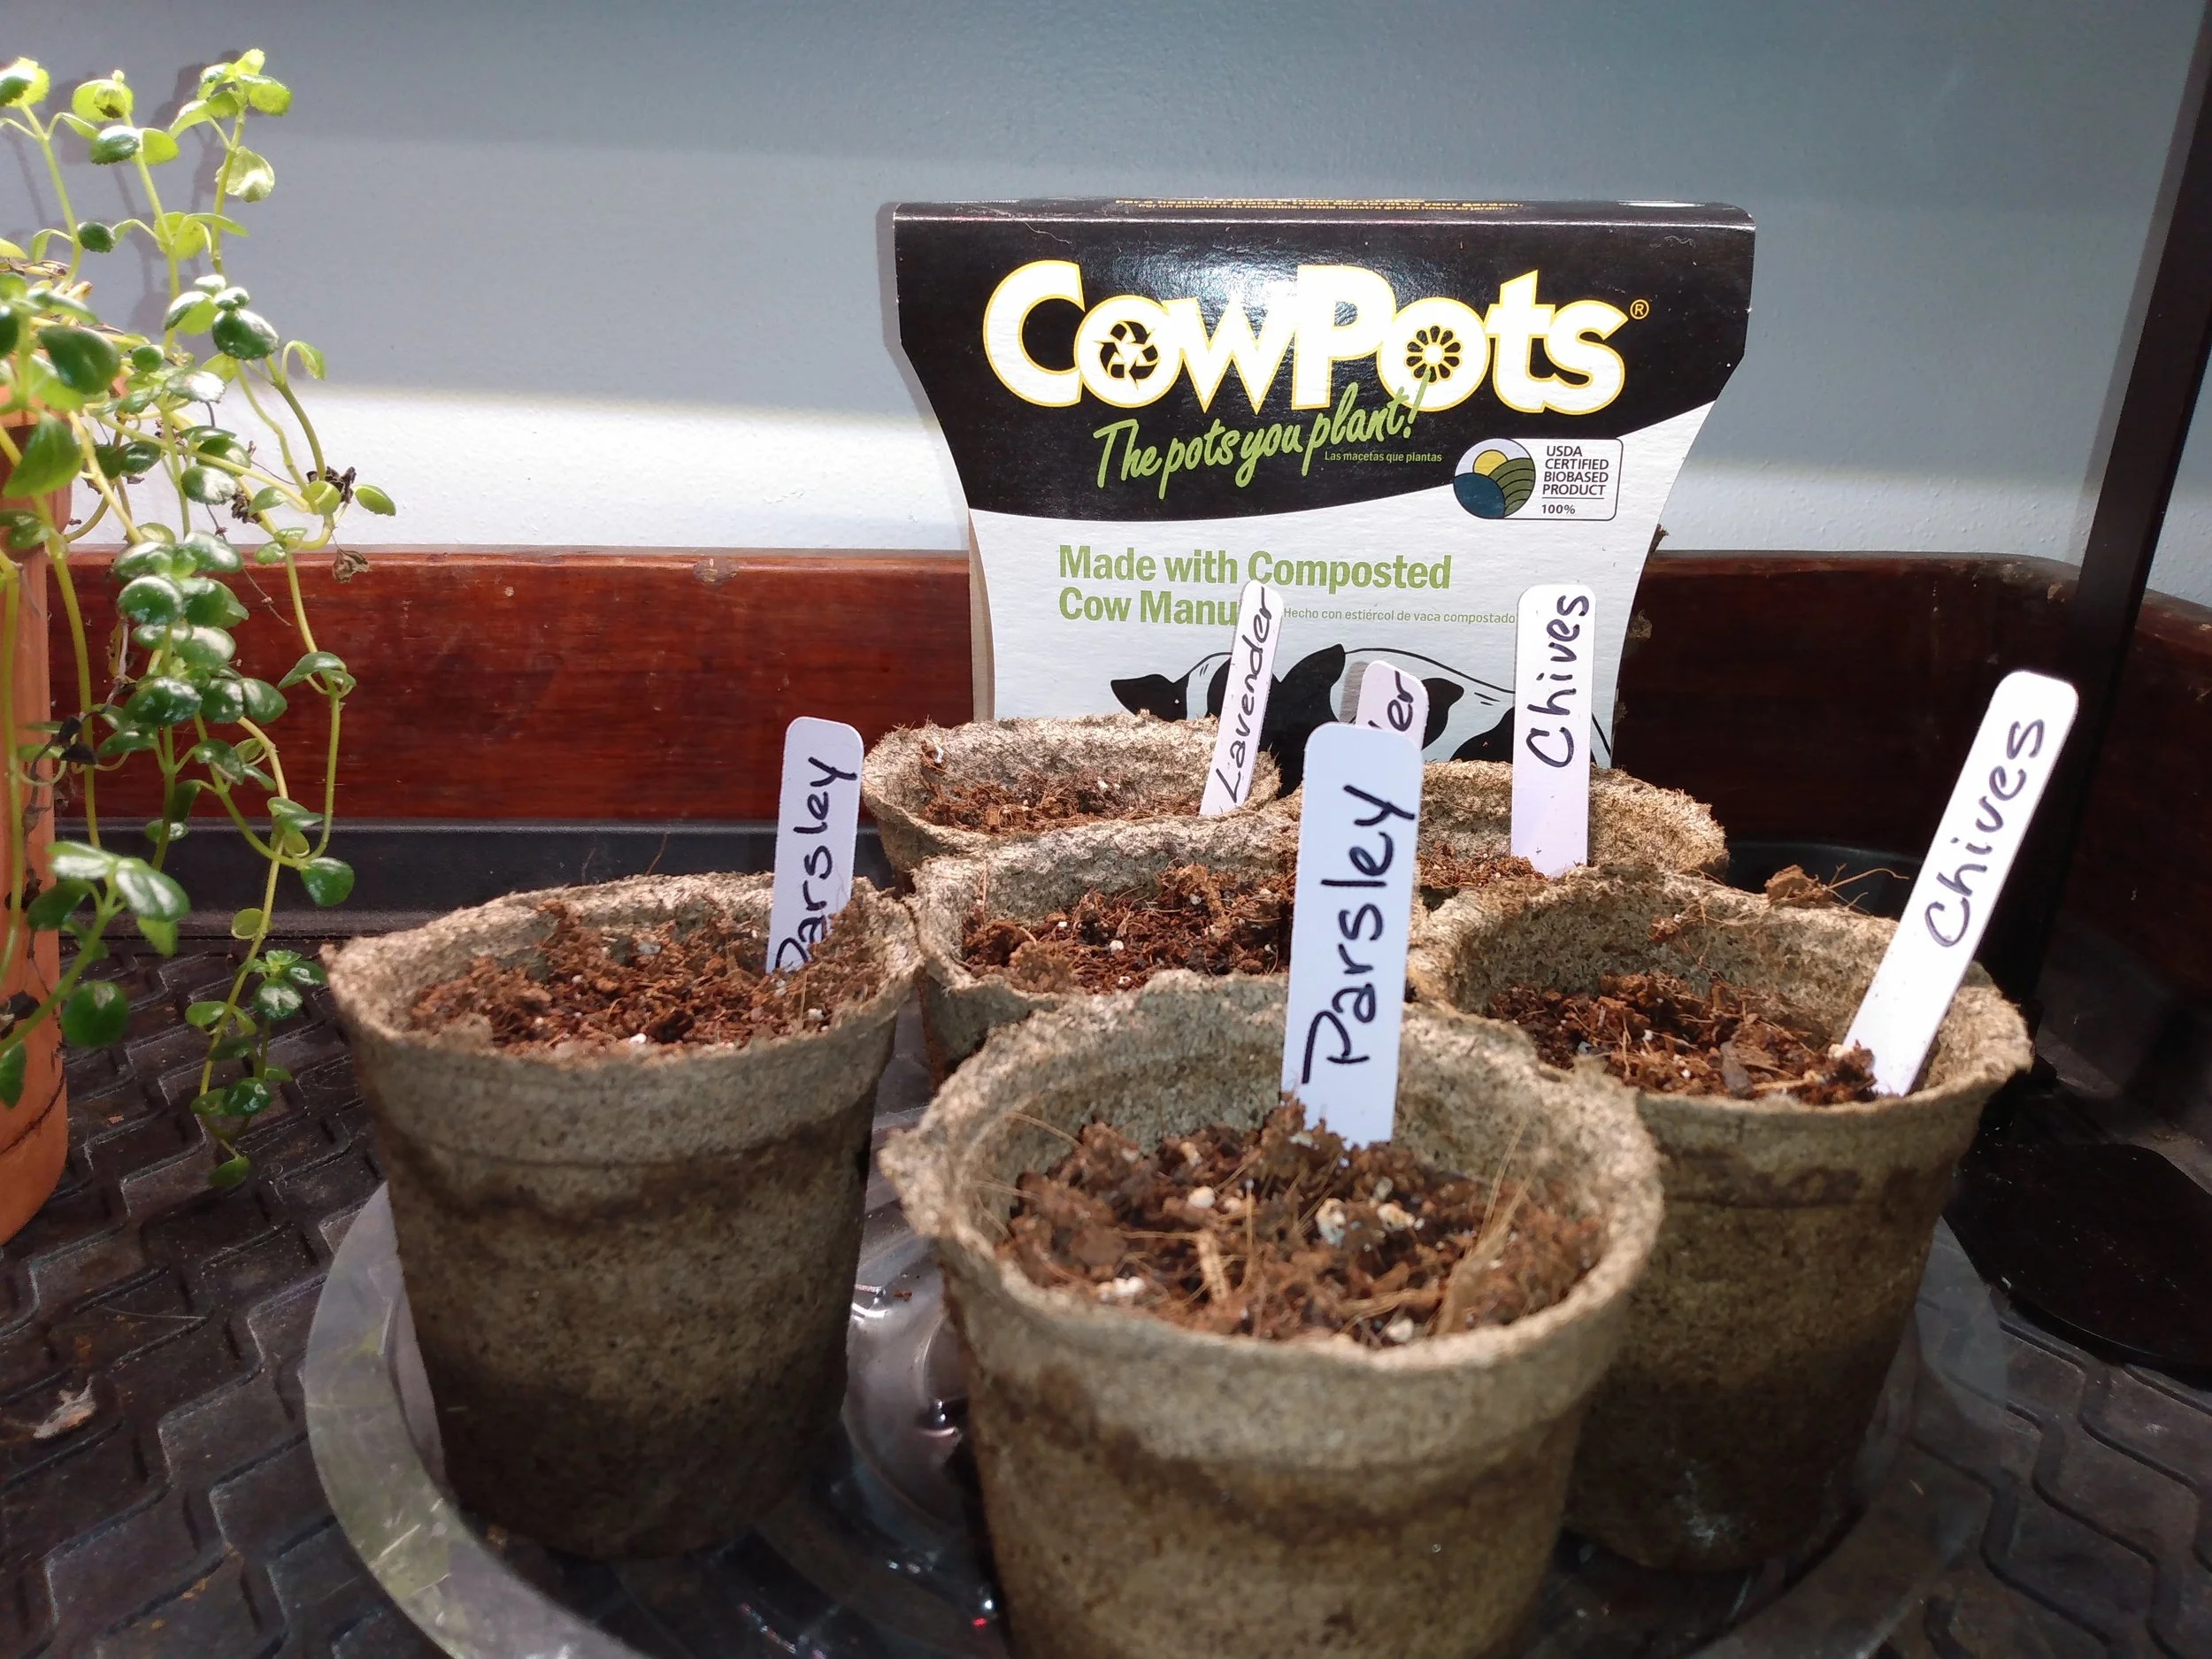
I like to use Cow Pots (instead of peat pots) because they reduce transplant shock.
Starting seeds indoors
Below are my basic instructions. Read the individual plant to see if it needs special conditions. If starting indoors, do this four to six weeks before your area's last frost date. Late March or early April if you are in zones 5 or 6.
I like to start herb seeds in individual pots. I often use Cow Pots because they decompose quickly in the garden, offer extra nutrients and reduce transplant shock. They are also more environmentally friendly than peat pots.
When I’m starting herbs I like my seed starting mix to be very light. I use a combination of coir, vermiculite, and traditional seed starter. I like the coconut coir because it holds moisture well and is good for root development. I like to mix it with a more general seed starter. My newest favorite that I have used for the past two seasons is the Coast of Maine brand. I mix these about 50/50 and moisten it well before putting in cow pots.
For most seeds plant them about 1/8 of an inch deep in the pre-moistened soil. Set them under grow lights in a warm room. Once seedlings emerge to keep the lights about four inches from the plants and turned on for twelve to sixteen hours per day.
Stratification
Some seeds require stratification or a period of cold chilling. This mimics winter and breaks a seed's natural dormancy so it can germinate. Other seeds need sunlight and should be gently pressed into the soil versus covering. Tiny seeds are often treated in this manner, because they do not have the reserves to grow through the soil.
Sowing Seeds Outdoors
Sowing seeds outdoors is easy and convenient. You can sow them in the ground or in containers after the last frost date. Prepare your soil and amend if necessary. Add plenty of aged compost. Herbs like well draining soil.
Scatter the seeds thinly or space them per the packet. Keep the soil consistently moist until germination.
Perennial herbs can be started outside in the fall. They will grow and develop a good root system before cold weather sets in. Don’t harvest them that first year but let them establish themselves.
6 Medicinal Herbs To Start With
The following herbs are easy to grow from seeds or plants. They have medicinal qualities and are great for teas and salves. The herbs that I have suggested have grown well for me in Zones 5 & 6. You can read more about what I plant when on my organic gardening blog.

Calendula
Calendula
Calendula is one of the easiest and most useful plants you can grow in a home garden. It grows well in Zones 5 and 6, supports pollinators and has a long history as a valuable herbal medicine plant. It is native to the Mediterranean region and brought over by immigrants.
Calendula is a beautiful plant and often used as a cut flower. It’s common name is pot marigold but it should not be confused with true marigolds. They are both in the daisy family but they are different genus.
Calendula is an annual in most of North America but will readily self seed. So pick a place in your garden where they can establish themselves. Plants grow about 12 to 24 inches tall with bright orange or yellow flowers.
An annual that is easy to grow from seed and it will readily reseed in the fall. Just allow some of the flower heads to go to seed.
Calendula is one of the easiest and most useful plants for your home garden. Learn how to grow calendula from seed and utilize this versatile calendula flower plant. Discover its benefits as a medicinal plant, perfect for creating your own herbal medicine and remedies.
The seeds are large, curved, and easy to handle. You can direct sow or start indoors. Direct sowing in the garden works well and is the simplest method. You can also plant them inside but I recommend using cow pots because it doesnt like transplanting. It matures quickly in just 55 - 60 days. Plant two seeds per square. A good variety is Alpha.
Different varieties are based more on the flower color than the medicinal properties. When choosing a variety look for the resin properties of the flowers. The resin is what gives you the best medicinal quality.
Harvest in the morning after the dew evaporates. Pinch or snip newly opened flowers at the base of the stem. Regular picking encourages the plant to produce more blooms.
Known for its anti-inflammatory properties it works well in a tea or a salve. It also has antimicrobial, and antioxidant properties that promote cell regeneration and fight infection.
Calendula’s good for antiseptic tinctures and healing skin ointments that are good for healing wounds, acne, and diaper rash. Research has shown that calendula is good for healing skin wounds and one study was done using it combined with aloe on women after childbirth.
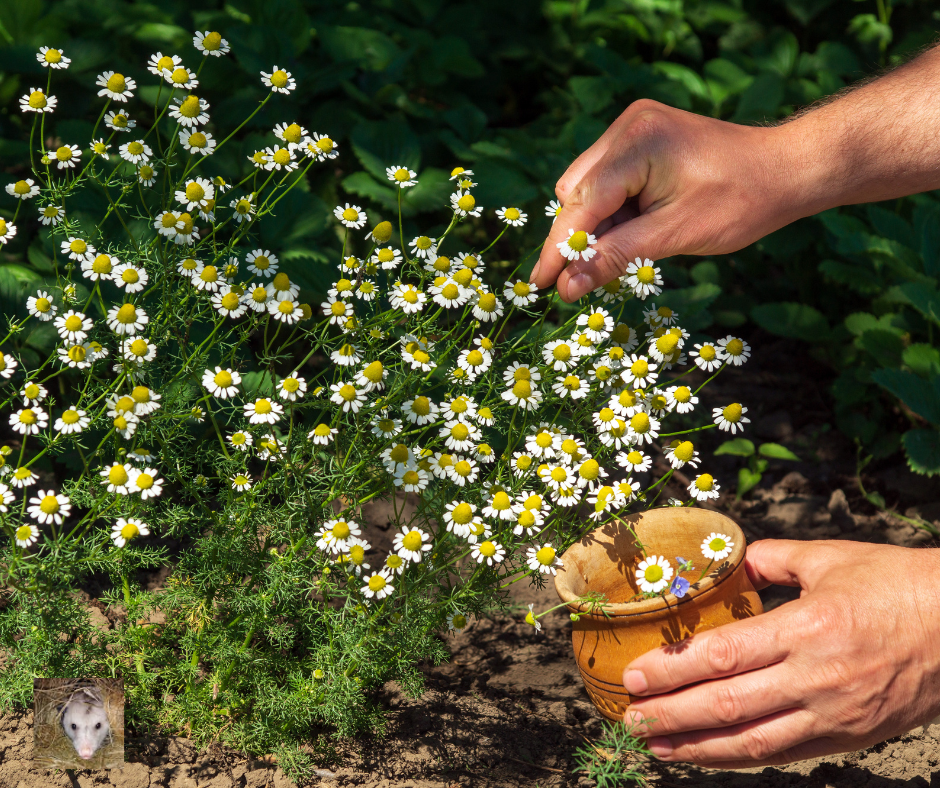
Buddy harvesting flower heads
Chamomile
Chamomile has an established reputation as a calming tea. Great for before bed or when you feel stressed. It has a unique, floral, apple-like scent. There are two main varieties, German and Roman. Both are native to Europe and introduced by early colonists.
German chamomile is an annual plant. It is more often used for medicinal remedies because of its strong, aroma and higher concentration of beneficial compounds.
Roman chamomile is a perennial that grows low to the ground and makes it an excellent ground cover or rock garden plant. However, it has lower amounts of beneficial compounds.
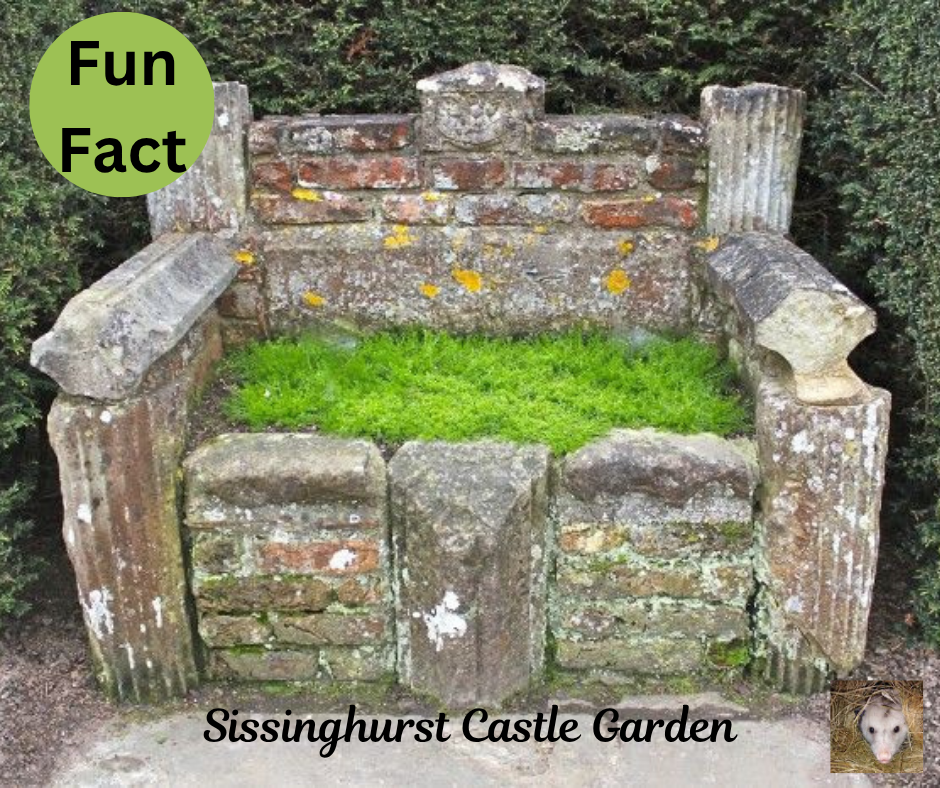
Fun Fact. Roman chamomile was often planted as the seat in outdoor chairs during the Elizabethan era in England.
The seeds are super tiny and they need light to germinate. After moistening the soil scatter the seeds. You cant really separate them and that's ok. Just divide as best you can. Then simply press them into the soil so they have good contact. They will sprout in 7 to 10 days.
Once they get a bit bigger You can divide them into smaller clumps to plant out. Transplant in mid-to-late spring once the danger of frost has passed. In the garden, chamomile is a beneficial companion to many vegetables and herbs. Because it repels cabbage moth, it is often planted near brassicas.
Harvest in the morning after the dew has dried. To harvest, gently snap off the flower heads, or use clean scissors to snip the bloom from the stem. Frequent harvesting, or deadheading, encourages the plant to produce more flowers. Remove the flower head from the green stem.
Chamomile is a wonderful medicinal plant to grow, offering natural remedies for relaxation and sleep. This video guides you through growing chamomile, covering planting and pest management. Discover how to incorporate this versatile plant into your herb garden for various herbal tea and culinary uses.
Dry flower heads by spreading the flowers in a single layer on a screen or baking sheet in a warm, dry area with good airflow. Air-drying typically takes one to two weeks. Alternatively, you can use a dehydrator on the lowest setting for one to four hours. Once completely dry, store the flowers in an airtight glass jar in a cool, dark place to maintain their potency.
When combined, calendula and chamomile complement each other and create a powerful, remedy for calming, reducing inflammation, and accelerating wound healing.
Chamomile’s antioxidant is called apigenin and it binds to certain brain receptors. That’s what helps us fall asleep and reduce insomnia. Using chamomile for a mouthwash or rinse can help soothe mouth sores. In addition, it can help reduce the intensity of menstrual cramps.

Echinacea is popular with bees and butterflies
Echinacea
Echinacea or Coneflower is native to the United States and traditionally used among Native Americans. A hardy perennial, it gets quite tall, up to four feet so plant it along a back border.
The beautiful blooms double as a cut flower and pollinator attractor. They want to be in full sun with well-draining soil. Perfect for a raised bed. Echinacea purpurea is a great variety to grow. Plant one per square.
Echinacea seeds need stratification thrive when exposed to winter weather. Plant in late fall just before the ground freezes. Prepare the bed, moisten soil, and scatter the seeds. Barely cover them with soil. I like to put some garden fabric over the beds because I have birds and chipmunks who are waiting to dig up the seeds.
You can also stratify them in your refrigerator in the spring. Place in damp paper towels in side a plastic bag and leave them in the refrigerator for 3 to 4 weeks. Then plant them in pots as described above. Seeds sprout in 10 to 20 days.
The roots and flowers are used in teas and tinctures. The flowers are ready to use every year. The roots need three or four years to develop before harvesting. Echinacea has lots of good medicinal effects including anti-inflammatory, antioxidant, and antiviral properties.
One caution: Echinacea can cause an allergic reaction in those that are allergic to ragweed.

Feverfew has been used traditionally to treat fevers, migraines, rheumatoid arthritis, and toothaches.
Feverfew
Chamomile and feverfew are closely related plants in the Asteraceae family with almost identical white and yellow daisy-like flowers. Chamomile leaves are feathery, and fern-like leaves (similar to dill) and they have a hollow, cone-shaped yellow center.
Feverfew has broader, more jagged leaves resembling small chrysanthemum or oak leaves. Its yellow center is flat rather than cone-shaped, and the plant has a strong, bitter, medicinal smell.
Feverfew is an easy to grow herb that thrives in everyday soil. In fact, it grows wild in yards and along roadsides. The short leafy plant produces tiny daisy-like summer blooms.
It likes full sun but will tolerate afternoon shade with a pH of around 6.5. This plant does well on the front edges of gardens as it typically grows between eight and twelve inches tall.
Feverfew grows easily from seed and can be planted in the spring or fall.
One planting caution: This plant readily reseeds and does not need pollinators. Which is good because your local bees may be repelled by its smell. So don’t plant with aromatic pollinating flowers.
Feverfew has been used traditionally to treat fevers, migraines, rheumatoid arthritis, and toothaches. It’s an anti-inflammatory and has been widely studied in the medical literature.
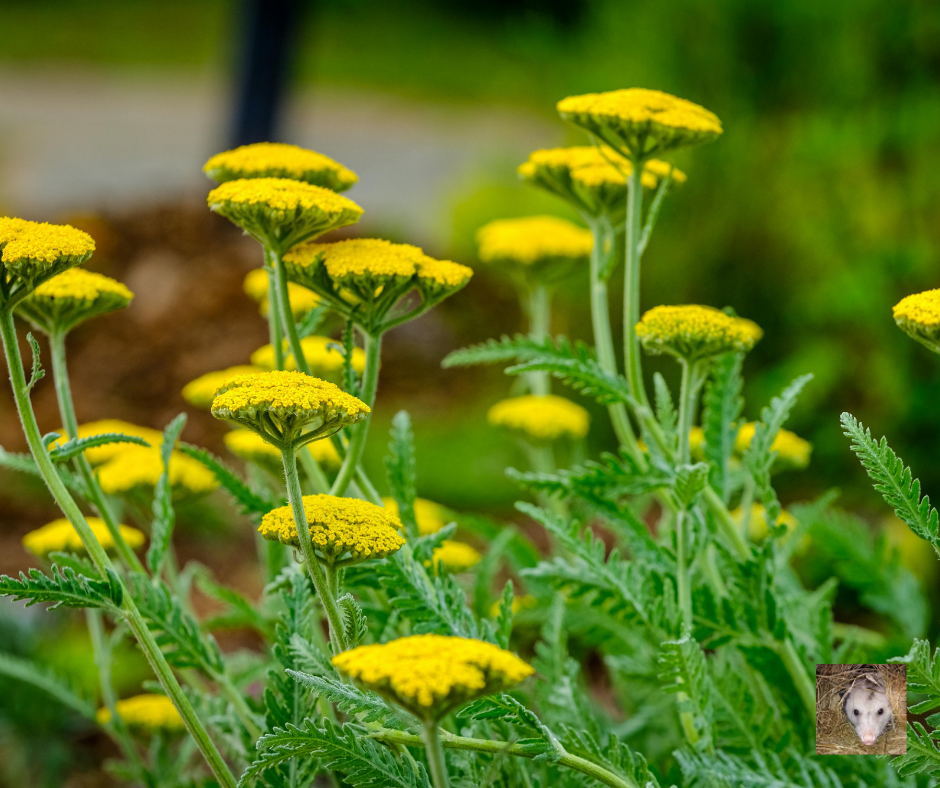
Yarrow
Yarrow is a common field “weed” that grows all over the USA. There are several cultivators and you can grow it easily from seed. The plants reseed itself so that you only have to plant it once. It can become invasive (like mint) so you may choose to plant it in a sunken tub or the back of the garden.
Yarrow likes full sun in soil rich in compost. Direct seed after the last frost since it does not like to be transplanted. Plants grow to one to two feet tall so space them about one foot apart.
White and yellow are the most common colors but they also come in shades of red. Two popular cultivars are Coronation Gold and Cerise Queen.
Yarrow is also a fabulous pollinator and provides food to many moth and butterfly species. It attracts beneficial insects such as parasitoid wasps and ladybugs.
Yarrow has many health benefits. It has been used traditionally to stop bleeding on scratches and wounds. In fact, one of the nicknames for yarrow is Nosebleed Plant.
In addition, it has been tested and can help lessen anxiety and reduce tremors.
9 herbs that do well in shady (3 - 5 hours of sun) spots in your garden or on the patio. Herbs are great for both cooking and natural home health care.
Fertilizing Herbs
Most herbs do not need much fertilizer. I recommend digging in compost when planting. In early spring I often shovel an inch or so of compost on top of the soil around the plants.
Watering Herbs
Water at the base rather than overhead, which keeps the foliage dry and helps prevent diseases like powdery mildew.
Herb Pests
While aphids are common pests, a small population is usually manageable and serves as a food source for beneficial insects like ladybugs. Chamomile also serves to draw aphids away from food crops. If an infestation becomes severe, a hard spray of water from a hose or the targeted use of insecticidal soap can manage the issue without harming the flowers.
They are sucking the life out of your plants. Aphids are considered one of the most destructive insect pests on vegetables as well as flowers. This video goes over how to recognize, control, and prevent aphids in your garden.
How To Make Herb Tea
To make tea with fresh flowers, use about 1 tablespoon (or a small handful) of fresh flowers per 8 ounces of water. Pour boiling water over the flowers, cover the mug with a napkin to trap the aromatic essential oils, and steep for 5 to 10 minutes. Strain before drinking.
For dried flowers put 1 - 2 teaspoons into a reusable tea bag, a French press, or a fine-mesh tea infuser. Pour the hot water over the flowers.
Make Herb-Infused Oil
Base Carrier Oil: 1 cup of either olive, sweet almond, jojoba, or coconut oil
Add Herbs: 1/2 cup dried (e.g., calendula, chamomile, echinacea, or yarrow)
Thickener: 1/4 cup beeswax pellets
How To Make Herbal Salve
Once you've created your herbal oil you can use it to make salve.
Makes 5 ounces.
Ingredients
1 oz. beeswax (use carnauba wax for a vegan salve)
4 oz. herbal infused oil(s) of your choice (choose one or a combination)
10-20 drops essential oil of choice (optional)
Directions
Wrap beeswax bar in an old towel. On a sturdy surface, use a hammer to break bar up into small chunks. You can also use pelleted wax.
Place beeswax in a double boiler and gently warm over low heat until the beeswax melts.
Add herbal oils and stir over low heat until well-mixed.
Remove from heat and add the essential oil(s).
Quickly pour warm mixture into prepared tins, glass jars, or lip balm tubes and allow to cool completely.
Store in a cool location for up to one year.
Author, Ame Vanorio, is the director of Fox Run Environmental Education Center. Ame has been gardening organically for over 30 years. She is a licensed wildlife rehabilitator and teaches classes both online and onsite.


Raising honeybees can be challenging and intimidating but very rewarding. I speak from experience when I tell you honey bees will make your gardening endeavors complete.