
Raising honey bees (Apis mellifera) can be challenging and intimidating but very rewarding. I speak from experience when I tell you honey bees will make your gardening endeavors complete.
Raising honey bees is one of the most practical ways you can expand your food production and benefit local ecosystems. Honey bees provide two major benefits: they produce honey (plus beeswax & propolis), and they pollinate crops and as well as wild plants. While honey is the product most people think about, pollination is the more important service.
A single hive can be kept in a backyard, garden, or small farm if local laws allow it.
Fun Fact: Both "honey bee" (two words) and "honeybee" (one word) are acceptable, but "honey bee" is the preferred spelling by entomologists because it emphasizes it's a type of bee, while "honeybee" is common in general dictionaries and everyday language.

The Advantages of Raising Honey Bees
Honey
Beeswax and propolis
Pollination for your garden plants and native species
Enjoyment
Nobody can outwork a bee
The Challenges of Raising Bees
Bees do get angry and can sting you
Allergies to bee stings can be serious
Honey bees can outcompete native bees in your area
Expense of supplies
Steep learning curve

Two of our past interns learning about honeybees. Finding a good mentor is important. Photo by Ame Vanorio
What Can You Produce With Bees?
Honey of course! However, we often overlook some of the other great things we can use from bees.
Beeswax forms the structure of the bee’s hive and is often seen as a leftover from extracting honey. You may remember when beeswax was sold in stores as a wood conditioner and car waxer. Its also used for making candles, preventing tools from rusting, and my favorite - making lip balm (my recipe below).
Propolis is the “glue” that holds the hives together. It also helps keep your bees healthy. Propolis is a natural anti-bacterial and anti-fungal. It is used to treat a number of health issues including diabetes, mouth sores, and inflammation.
You can chop the propolis and place it in capsules like these to take when you aren't well.
Fun Fact: Ancient Egyptians used propolis to embalm cadavers.
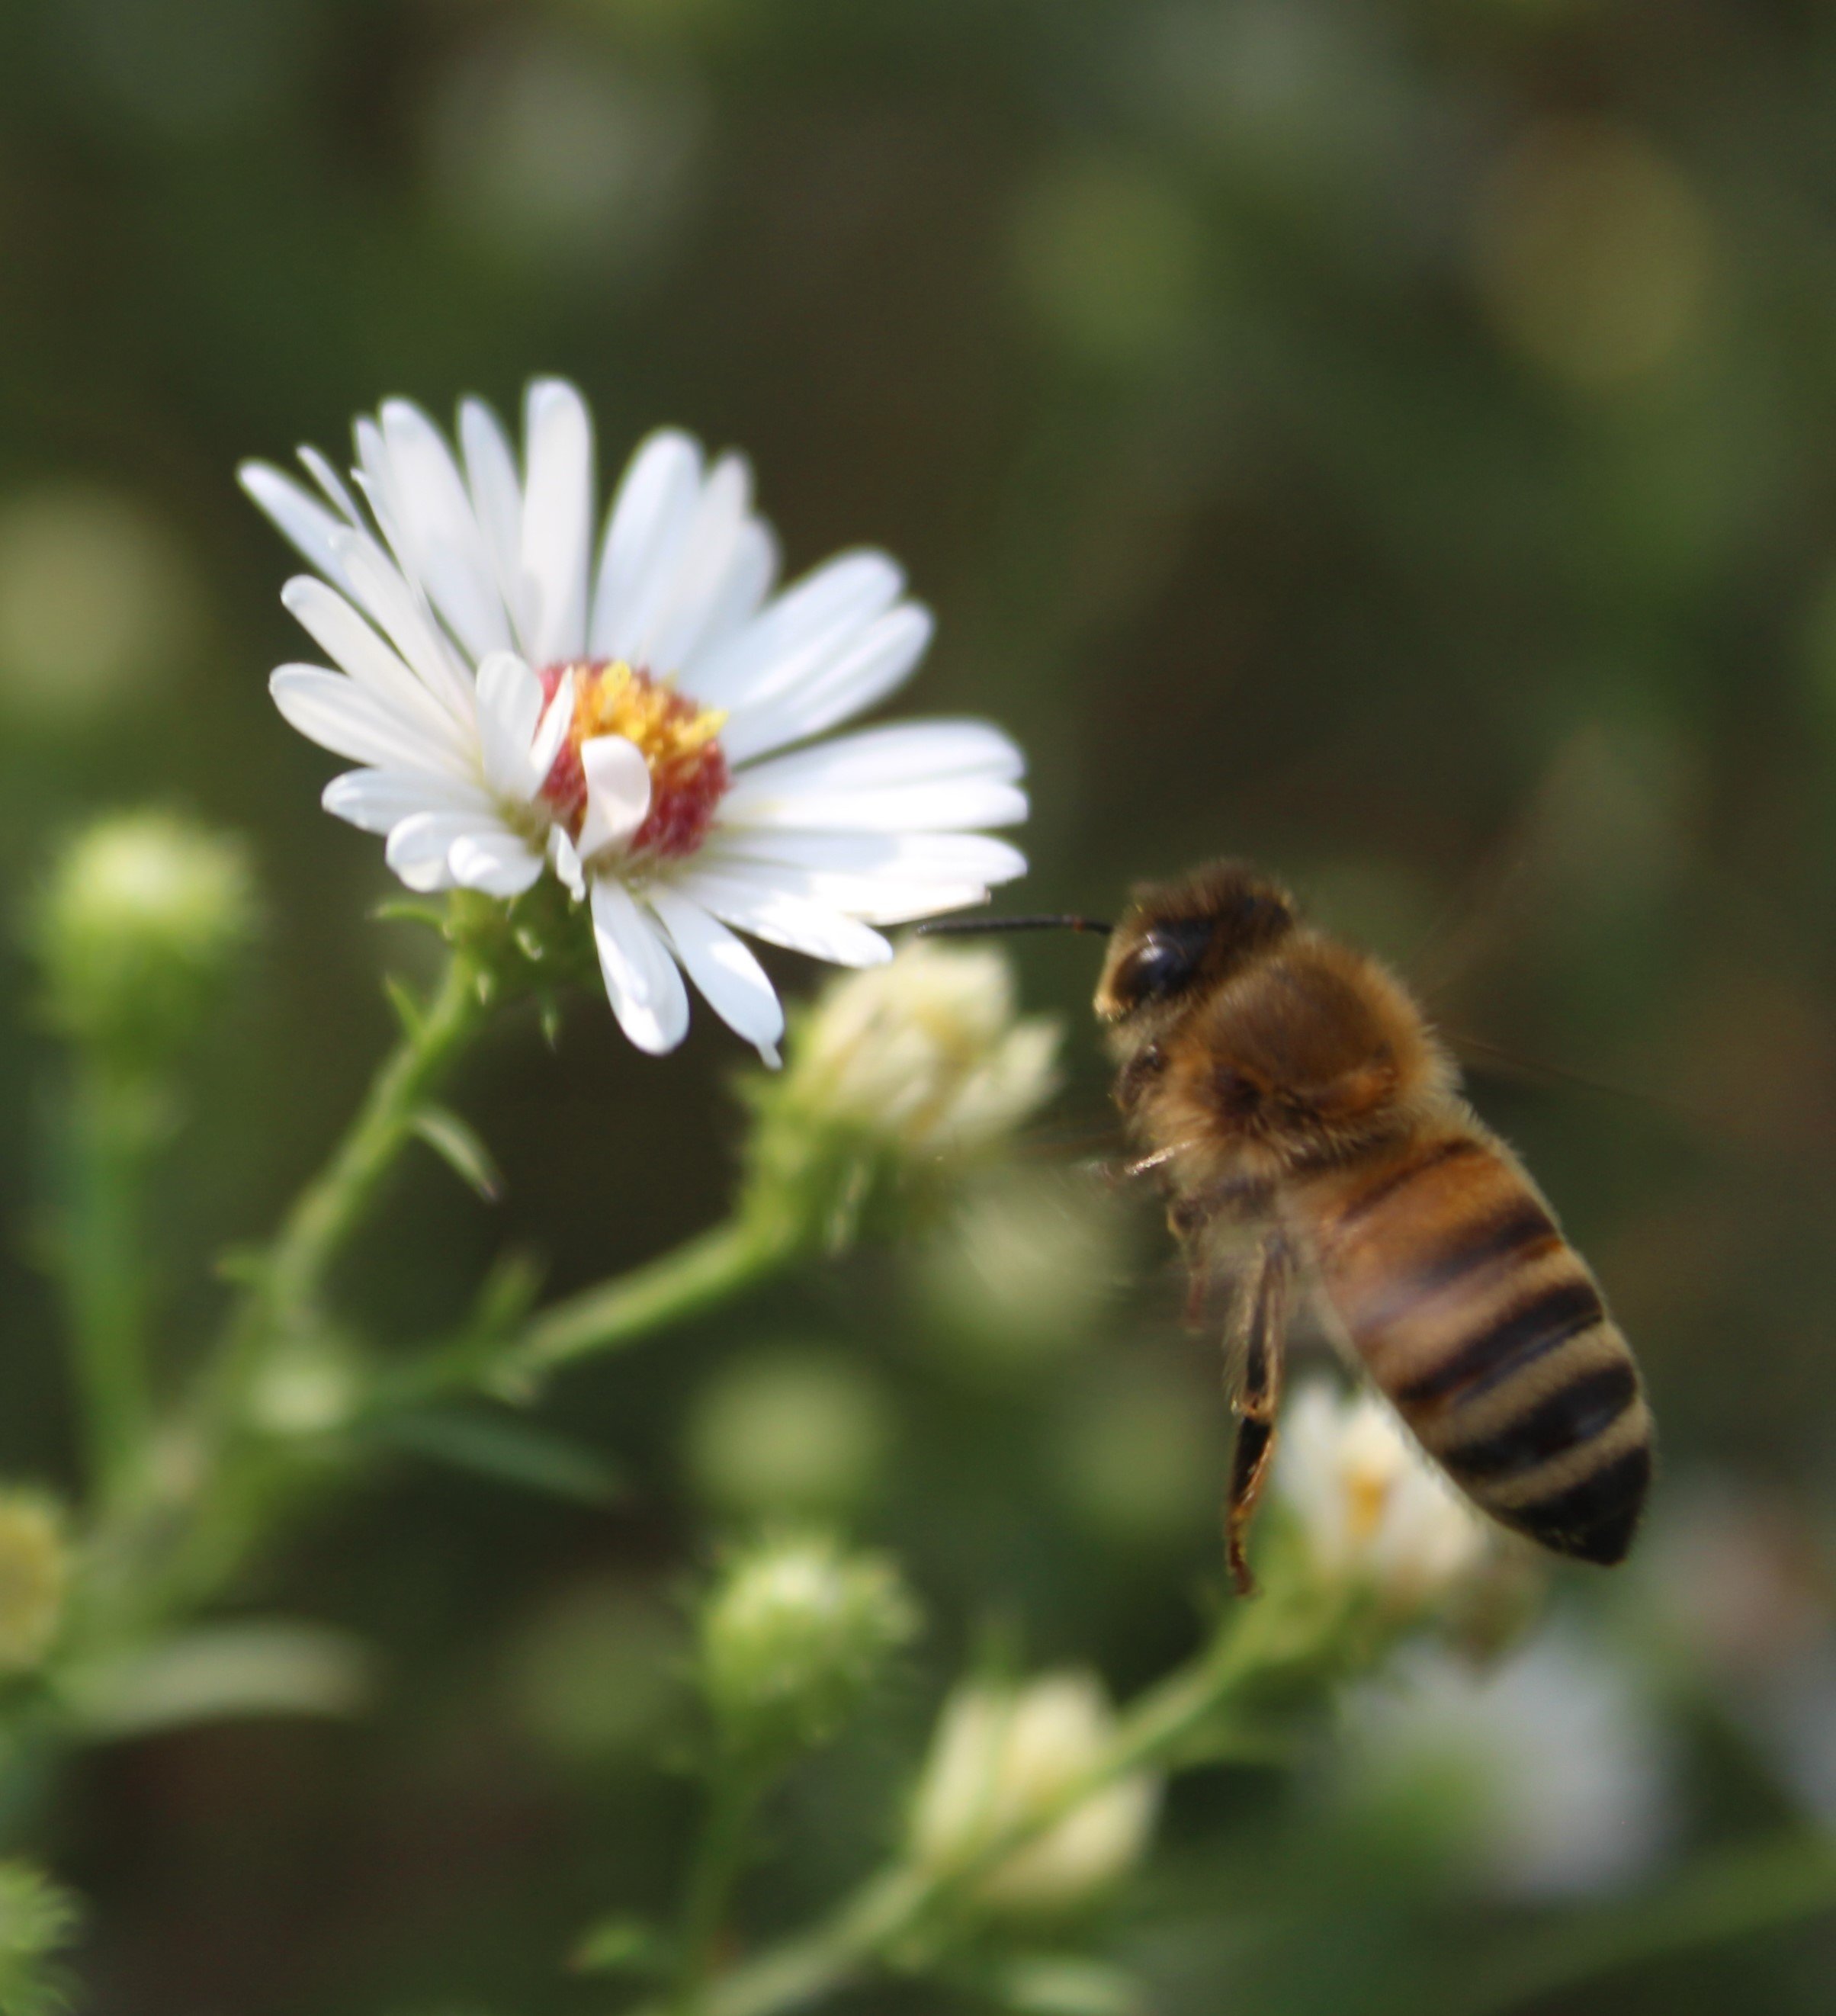
Honey bee on fleabane. Photo by Ame Vanorio
Honeybee Biology and Colony Structure
A honeybee colony functions as a single living system made up of three types of bees: one queen, thousands of worker bees, and seasonally present drones. The queen’s primary role is reproduction. She lays eggs and produces pheromones that help maintain colony cohesion. A healthy queen can lay over a thousand eggs per day during peak season.
Worker bees are all female and perform nearly all tasks within the hive. Their jobs change as they age. Young workers clean cells and feed larvae. Middle-aged workers produce wax, build comb, and guard the hive. Older workers forage for nectar, pollen, water, and plant resins. This division of labor allows the colony to function efficiently.
Drones are male bees whose only role is to mate with queens from other colonies. They do not forage or help maintain the hive. Drones are produced in spring and summer and are usually expelled from the hive before winter to conserve resources.
Pollination: Two Sides of the Coin
Many food crops depend on insect pollination. Apples, cherries, blueberries, cucumbers, squash, almonds, and many seed crops produce higher yields and better-quality fruit when pollinators are present. Even plants that are partially self-fertile often benefit from insect activity. Pollination is a big plus when it comes to keeping bees. I have seen an increase in tree fruit when I’ve had bees as well as squashes and melons.
Honeybees are not native to North America, but they have been managed here for hundreds of years. They are considered livestock rather than wildlife. Honey bees are great pollinators but they do compete with other species. If you just want increased pollination you can encourage mason and bumblebee populations around your gardens.
Good beekeeping goes hand in hand with habitat support. Planting diverse flowering plants, reducing pesticide use, and providing nesting sites for native insects benefits the entire pollinator community. Honeybees should be one part of a larger pollinator-friendly landscape, not the only focus.
Read our article on The Loss of Insects and How it Affects Your Garden
Both honeybees and native bees play a very important role in their ecosystems. By pollinating flowers and fruits they are a critical part of the food web. Honeybees are managed insects, not wildlife. A healthy hive can contain tens of thousands of bees working together.
In agricultural areas, managed honeybee hives are often moved seasonally to pollinate crops like almonds, apples, blueberries, and squash.
Insect populations are plummeting. What does this have to do with your garden? A LOT! Gardens are part of the ecosystem and provide food and shelter to many species. Learn more watching my video.
Step One For Beekeeping - Know the Laws
The sad truth is that many communities have laws about keeping bees. If you are in a rural area you should be good to go.
However, if you are in a city, town, or sub-division you will need to check zoning regulations and/or your HMO. Some may allow bees but have rules about where you can place the hive. For example, how close to a property line or if you need a screen near the entrance.
Screens can be fencing or tall plants that encourage the bees to get up higher in flight so as not to “run into” people or pets.
Talk to your neighbors to make sure they are good with bees. Your bees can not be trained to stay on your property. An offer of honey goes a long way.
You may also work with a local landowner to place your hives on their property. My friend Jake had a conflict with his hives and a particular neighbor so his bees came to stay at my farm.
Some states require you to register your hives as a way to monitor diseases among bees. Also if you plan to get into selling bee products there are laws about the labeling and distribution of your products.
Farmers markets often have a big demand for local bee products.

Bees outside hive. Photo by Ame Vanorio
Step Two - Learning
Step Two is learning. Many people think you can put up the hives and let the bees go to town. It can be a bit more complex than that. Take some time to become familiar.
Find a local bee club! Your extension office or local gardening club may have a bee group. Attend meetings and talk to people.
If you are not near a face-to-face group there are several good bee groups online.
Bee Culture puts out a suburb magazine and podcast.
A great online course is taught by Master beekeeper, Charlotte Anderson. Very reasonably priced. I have not taken the course but I did hear Charlotte speak one time and it was a great presentation.
Step Three - Location, Location, Location
Bees can be picky about real estate locations! You will want to give some thought as to where you place your hive.
Bees like to face the rising sun. So east. The morning sun warms up the bees so they will leave the hive and gather pollen. Southern facing hives are also good.
Tips for hive location
Bees need sun and water just like plants
Near water such as a pond or gentle moving stream.
Bees don’t like marshlands or areas that may flood
Avoid the tops of hills that may be windy
Know What Flowering plants Are Near You
Before you set up your hives do a plant audit. These could be wild plants such as maple and locust trees, clover in yards, asters, or dandelions.
Your audit would also include your domestic garden plants such as fruit trees, summer squashes, cucumbers, and beans.
What plants do you have growing? Do you have plants that flower at different times during the season - thus providing pollen from spring to fall?
Look around you. What plants do your neighbors have? Are you near a field or park with native grasses?
Lots of flowering plants over a long season benefits your bees.
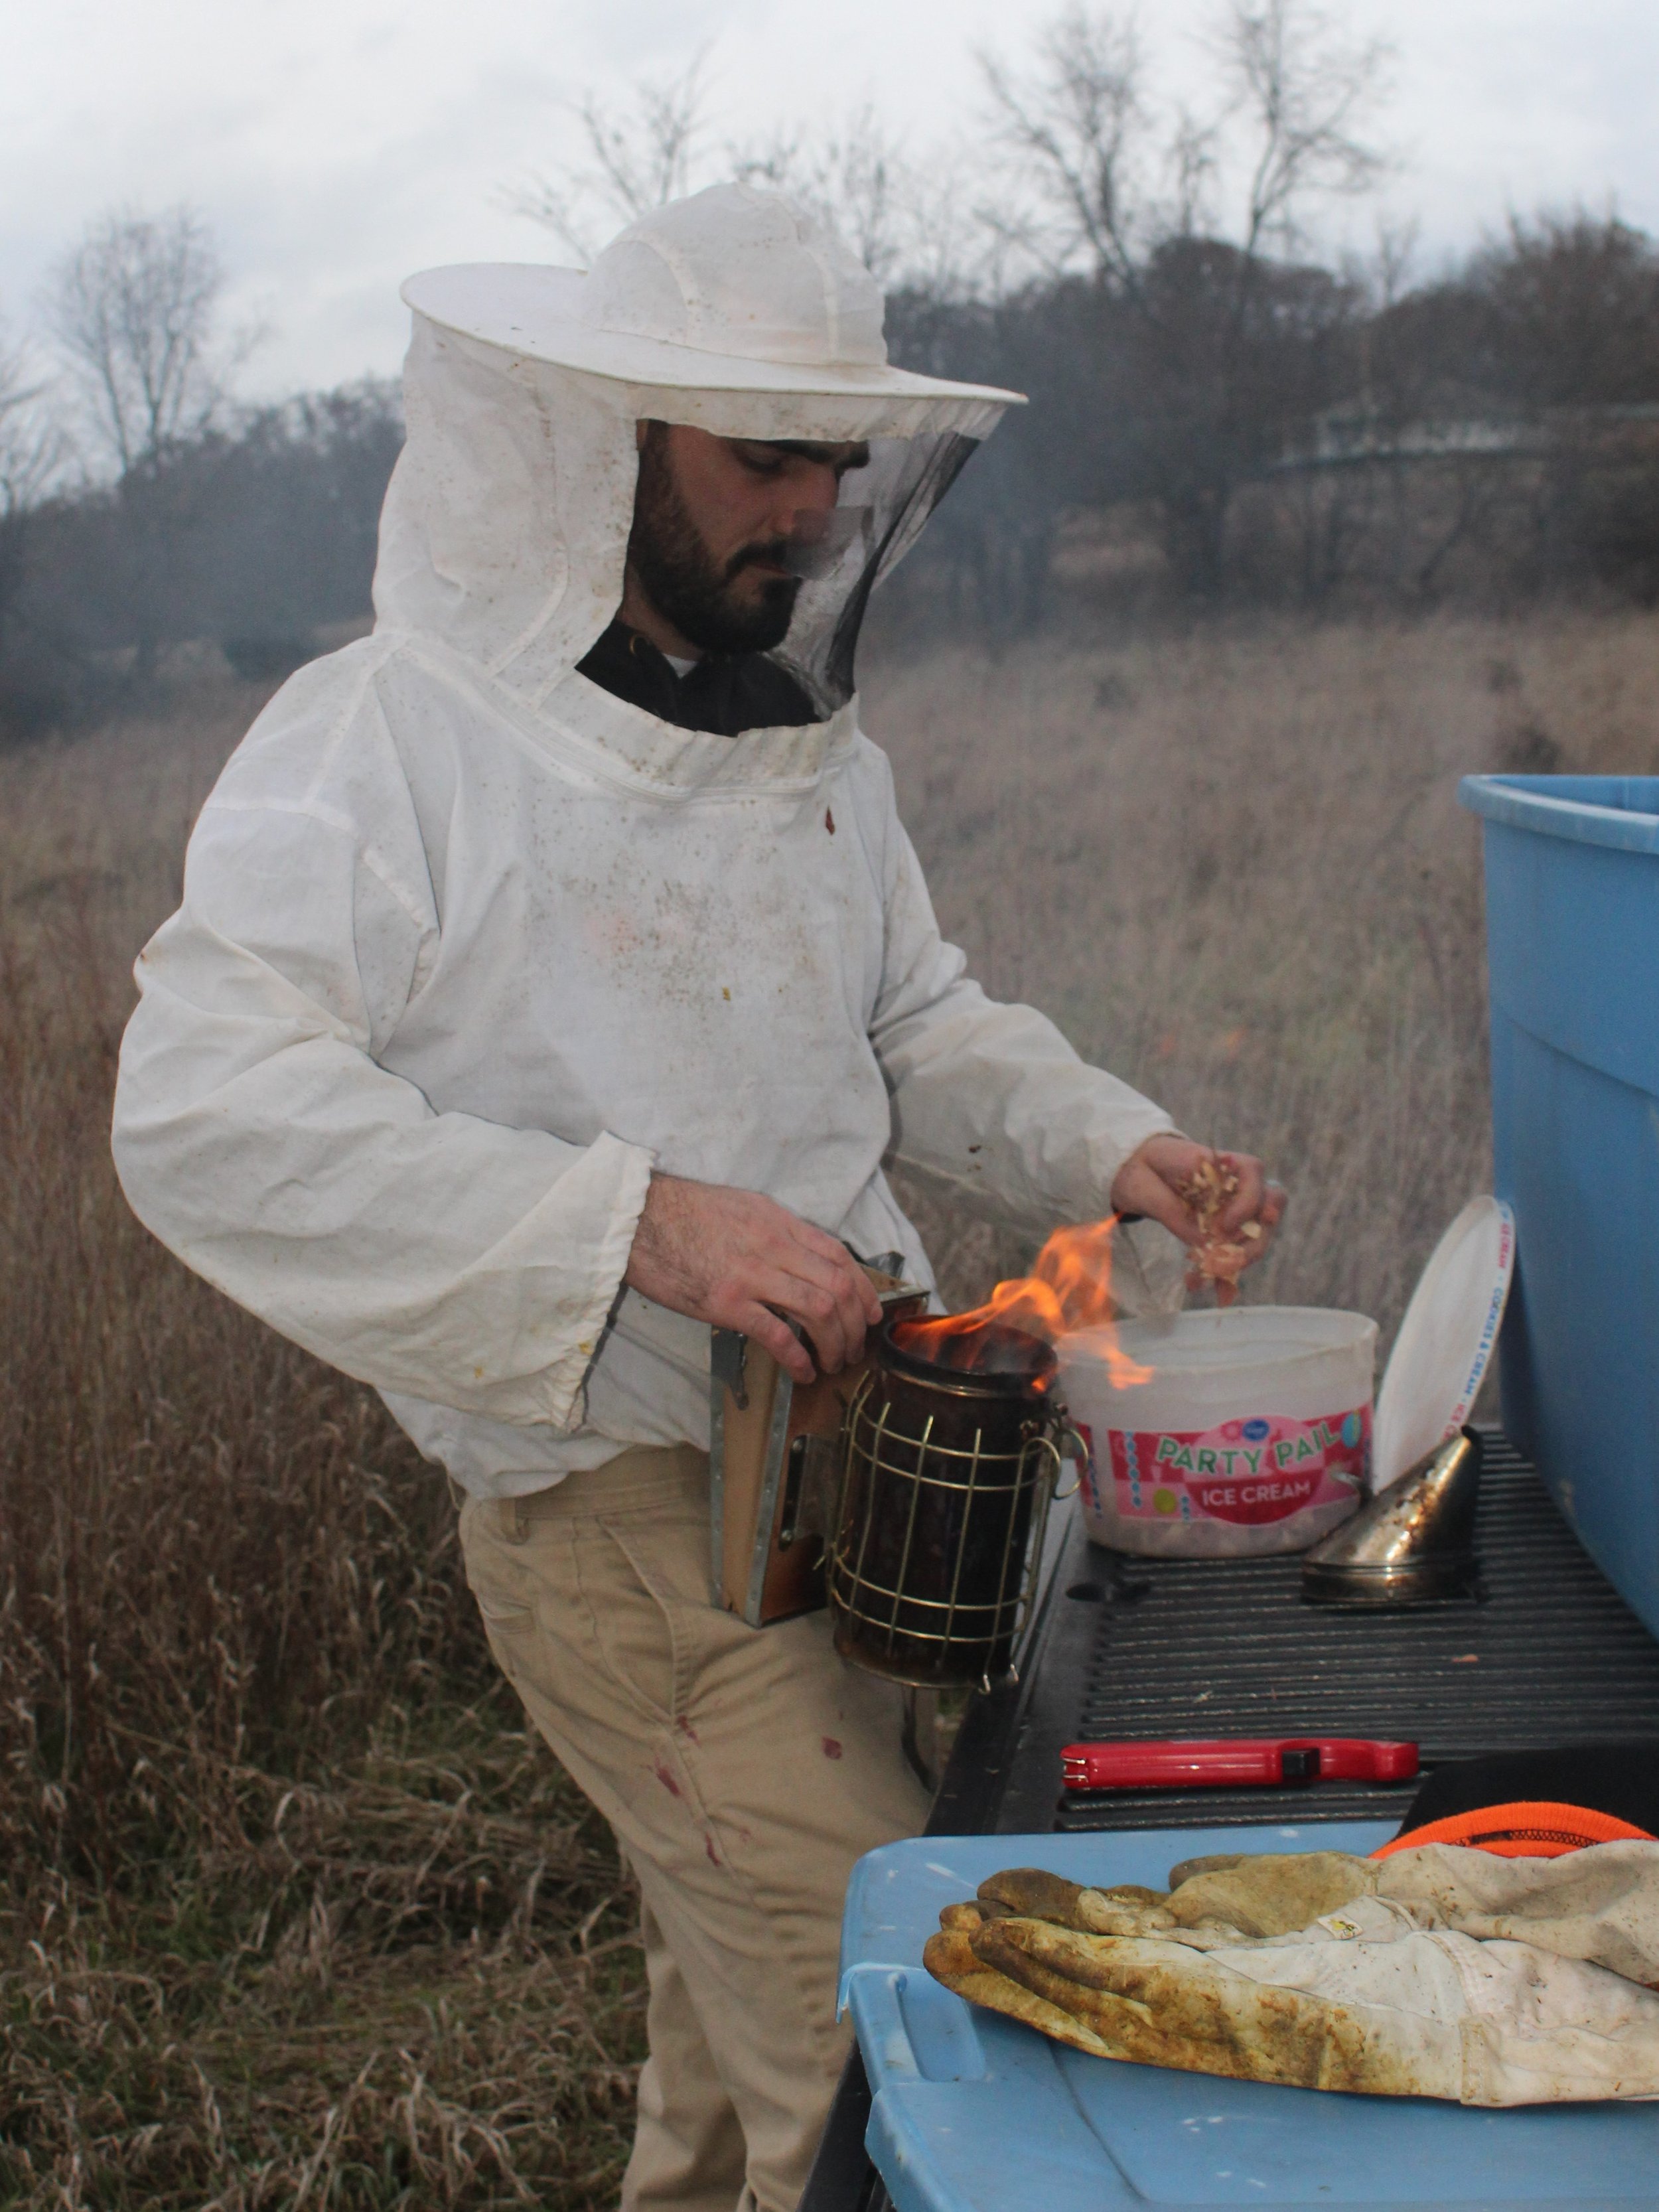
Getting the smoker ready. Photo by Ame Vanorio
Step Four - Buying Equipment
Remember when I said beekeeping can get expensive? To get started you do need a number of supplies. You can start with the basics but you will need to purchase more supplies as you grow.
Clothing
At the minimum, you will need to buy a head covering or veil. Having angry bees swarming around your face is not fun.
Full body suits have come down in price and you can find less expensive ones for around $100.
Dressing in layers with long sleeves and pants that are tied at the cuffs (so bees can’t climb inside) and tucked into tall boots and gloves also offer some protection.
White or light colors are best.
Good sturdy gloves are a must.
You will need two essential tools for your hives.
Smoker: Smokers provide an area to burn dry materials such as pine needles or wood chips. The smoke helps to calm the bees. A small smoker is fine to start out with.
You can also purchase smoke You want to produce cool white smoke.
2. Hive tool: This is a crowbar-like device that is used as a lever to loosen the frames and boxes. It’s needed because the bees naturally glue everything together.
Some people also like Frame Grips which allow them to get a firm grasp on the frames when they are inspecting the hives.
Subscribe to my YouTube Channel for videos on organic gardening, homesteading, and wildlife!
Purchasing The Hive
When I first started beekeeping, I didn’t realize there were so many styles of hives.
Langstroth
I started with the common Langstroth hive which is what I recommend for beginners. It is the classic hive made of boxes (supers) that stack on top of each other. Inside the boxes, you place the frames.
Expect to pay from $100 - $300 depending on the size (how many/what size boxes/type of wood)

Parts of a Langstroth Hive. Image from Maasai Honey, a nonprofit which donates hives and teaches rural women of Tanzania to be beekeepers.
Top Bar Hive
This horizontal hive is one of the oldest designs and is quite popular. It’s a great choice for beginners because there are no heavy boxes to lift and it is easy to inspect. Balanced Beekeeping I: Building a Top Bar Hive is a great book if you want to build your own hive.

Top Bar Hive. Photo by Pierre Javaudin
Step Five Buying Bees
In America, we raise the European Honeybee, Apis mellifera, which is just one of over 20,000 known bee species.
As a new beekeeper, you will want to purchase bees. That way you know what you are getting and the process will be easier. Your local bee group will be able to recommend persons in your area who sell bees. Or they may go in on a group order of a larger company.
Typically you place orders in the winter for spring delivery. Many companies sell out quickly!
A honey bee package contains an inseminated queen (she’s in her own container) and a screened cage of about 10,000 worker bees.
Breeds of Honeybee
Sometimes what breed of bee you get will depend on your area of the country and what’s available.
However, there are several popular breeds in the US
Italian - docile and good producers of honey, often recommended for beginners
Russian - hardy bees that can fight off varroa mites, a more advanced keeper
Buckfast - a hybrid developed in England to be resistant to mites and diseases
Carniolan - more cold tolerant, good for beginners
The Caste System
Honeybees have a social hierarchical system that benefits them as they work together.
Queen - the only bee mating and laying eggs. She only leaves the hive to mate or to swarm.
Worker bees - females that care for the young, forage, and make honey.
Drone - Males. Their job is to mate with the queen and if successful, they die.

Step Six Maintenance
Bees need checkups and regular maintenance to make sure they are healthy. You will want to periodically inspect your hives during the active season.
Is your queen alive and laying eggs?
Are the workers storing honey?
Do they have enough room?
Don’t inspect hives during the winter as you don’t want the heat to escape. The bees will be resting and eating their honey stores. During days that are above freezing, they will go fly around and eliminate waste.
Fun Fact: Bees don’t poop in their hives.
Seasonal Care and Hive Management
Beekeeping follows a seasonal cycle. In spring, colonies expand rapidly. This is the time to monitor queen health, add space to prevent overcrowding, and manage swarming behavior. Swarming is a natural process where part of the colony leaves to form a new hive, but it reduces honey production.
Summer management focuses on maintaining space, monitoring for pests, and ensuring adequate ventilation. Honey supers are added when nectar flows are strong and removed after harvest.
In fall, the goal is to prepare bees for winter. This includes ensuring sufficient food stores, reducing hive entrances, and managing pests before cold weather sets in. Winter is a quieter period, but periodic checks ensure hives remain dry and secure.
Pests, Diseases, and Colony Health
The greatest challenge facing honeybees today is the varroa mite. These external parasites weaken bees by feeding on them and transmitting viruses. Without management, varroa mites can destroy a colony within one to two years.
Other concerns include fungal diseases like chalkbrood, bacterial infections such as American foulbrood, and stress from poor nutrition. Regular inspections help detect problems early.
Integrated pest management is the preferred approach. This includes monitoring mite levels, using mechanical controls, encouraging genetic resistance, and applying treatments only when necessary. Strong, well-fed colonies are more resilient to disease.
Step Seven Getting Honey
So you have your bees all settled in that new home. Now you want to know “where’s the honey?” Think of bees like perennials. You may get a harvest that second year but your bees need time to grow and make honey.
The average you can expect to harvest is about 50 pounds (4.2 gallons) of honey annually from a healthy hive in an area with abundant nectar.
It helps to go out to an experienced honey farm and participate in harvesting. This way you get an idea of how much honey you can take and how to deal with unhappy bees (they don’t willingly give up the goods!)

Examining the hive frames. Photo by Ame Vanorio
Is Your Honey Ready?
The bees send their honey through a process that involves ripening the nectar by removing moisture. When the honey is the right moisture content (about 18%) they cap it with bees wax.
Honey Production and How Bees Make Honey
Honey begins as nectar collected from flowers. Forager bees store nectar in a specialized stomach and return it to the hive. Inside the hive, nectar is passed between workers, who add enzymes that break down complex sugars. The nectar is then deposited into wax cells.
Bees reduce moisture content by fanning their wings, which prevents fermentation. Once the moisture level drops low enough, the honey is capped with wax and stored as a long-term food supply. Honey provides carbohydrates needed for winter survival and brood rearing.
Beekeepers harvest excess honey, taking care to leave enough for the colony. Ethical honey harvesting prioritizes bee health over yield. Overharvesting can weaken colonies and increase winter losses.
How Much honey Should I Leave The Bees?
Remember the bees are making honey to feed themselves during cold weather. If you take too much honey they can starve. Thankfully your little worker bees will probably have honey to spare.
Extracting Honey
Make Lip Balm From Your Beeswax
I spend a lot of time outdoors even in cold windy winter. A good lip balm is a lifesaver for my comfort.
This recipe is quick and easy and makes one to two lip balms depending on the size of your containers.
Ingredients
2 Tbsp chopped beeswax
3 Tbsp olive oil
1 tsp raw honey
Materials
A one-quart stainless-steel or Pyrex baking container. It’s best to have a pot dedicated to your bee projects as they do get a tad messy.
A small wooden slotted spoon
Container to hold lip balm - A small glass jar ( I use baby food jars) or a tin made for cosmetics
Process
Place the beeswax and oil together in your baking pan
Put the pan in the oven on the lowest heat for an electric stove. If you have an older gas stove the pilot light works also.
You can also melt the beeswax with the oil over low heat in a double boiler
As soon as the wax has melted, remove the pot from the heat and add the honey. Stir them until they are combined.
Pour into your container and let set until firm.
Tips
You may have to work with it to get the consistency you want.
If the solidified balm feels too firm, remelt and stir in another tablespoon of olive oil.
For a firmer product, remelt and add a bit more beeswax.
Author, Ame Vanorio, is the director of Fox Run Environmental Education Center and thinks bees are the best! Ame is an author and wildlife rehabilitator.


What is the best thing about June? Fresh strawberries, of course! Strawberries are easy to grow and provide an excellent yield for the amount of space.
In addition to the fantastic taste, strawberries have many great qualities. They are the first fruit of the season and the quickest fruit to produce from planting to eating. Strawberries are also very nutritious and are loaded with vitamin C and antioxidants.